Data Source Editor
The Data Source Editor allows users to define, configure, and save connections to Data Sources. These Data Sources can then be used throughout the inorigo® suite and external tools via the API. The Data Source Editor provides essential capabilities for data integration in inorigo®.
Overview
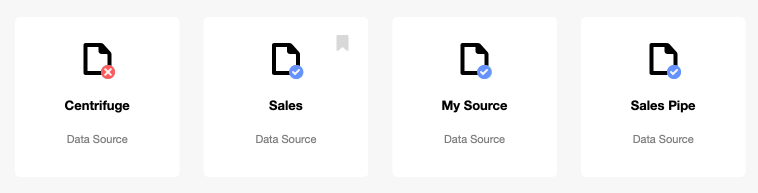
Each Data Source is presented as a card and appears either on the Workbench area or when opening the Data Source Editor. A small symbol indicates whether the connection is OK or not. Different Data Sources can make use of the same connection.
Dependencies
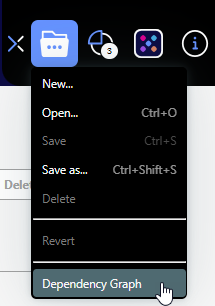
To find out which Connections the Data Source is dependent on, or if it is used by one or more Knowledge Sets / Applications, select the Dependency Graph in the menu.
Data Source Types
CSV
1. Name & Type
| Data Source Name (required) | Name the Data Source to find and use it in Data Source Editor and throughout inorigo®. |
| Data Source Type (required) | Choose the type of Data Source to create. Once a type is chosen, type-specific settings are in the next step of the wizard. |
2. Connection
Choose an available connection for the selected Data Source Type. If the desired connection has not yet been created, press Create New Connection.
Read more about the Connections types and settings in the section below.
3.A – Based on a Folder Connection
| Target (required) | Target either a single file by typing in Filename or target many files by typing in a Filename pattern (using Windows Wildcard symbols |
| Source Character Set | Set the character set that the source file is encoded in. Default character set is UTF-8 |
| Delimiter (required) | Choose which symbol that separates the data in the CSV-file(s) into columns. The options are: 1-Comma , 2-Semicolon ; 3-Space 4-Tab 5-Other Delimiter can be a quotation mark ' or Double quotation " |
| Header Row | Enter the number of the row where the Header are placed in the files. The first row in the file is written as zero in the input field. If no headers are available in the file/files headers will be automatically be named as: #1, #2, #3, #4 |
| First Data Row (required) | Enter the row number for the first data row to be included in the Data Source, so that inorigo® will know on what row it should start reading the data. |
| Last Data Row | Set a last row to include in the Data Source – rows below will not be read and will not be available in the data source. |
3.B – Based on a URL Connection
| Method (required) | Choose HTTP Request method. Chosen method works as a request-response protocol between the URL and inorigo®. You can read more about HTTP Request methods here | |
| SOAP Action | Specifies the SOAP (Simple Object Access Protocol) action to use in the HTTP header when invoking this method as a web method via HTTP | |
| Accept (required) | The Accept request-header field is used to specify file types that are acceptable for the response. | |
| Content-Type (required) | Default: text/xml; charset=utf-8 | |
| Body | Request body if Method is set to POST | |
| Query String Key | Query String Value | Enter additional parameters to the URL address to assign specific values. ?? |
| Target (required) | Enter the path to the target file. Target is added to the path defined by the connection. The full given path is displayed underneath the Target field. | |
| Source Character Set | Set the character set that the source file is encoded in. | |
| Delimiter (required) | Choose which symbol that separates the data in the CSV-file(s) into columns. | |
| Header Row | Enter the number of the row where the Header are placed in the files. The first row in the file is written as zero in the input field. If no headers are available in the file/files headers will be automatically be named as: #1, #2, #3, #4 | |
| First Data Row (required) | Enter the row number for the first data row to be included in the Data Source, so that inorigo® will know on what row it should start reading the data. | |
| Last Data Row | Set a last row to include in the Data Source – rows below will not be read and will not be available in the data source. |
Excel File
Applicable Formats
Tested and supported formats are: XLS, XLSX and XLXM. Although not tested, it is likely that other formats based on Apache POI such as Open Office also works.
1. Name & Type
| Data Source Name (required) | Name the Data Source to find and use it in Data Source Editor and throughout inorigo®. |
| Data Source Type (required) | Choose the type of Data Source to create. Once a type is chosen, type-specific settings are in the next step of the wizard. |
2. Connection
Choose an available connection for the selected Data Source Type. If the desired connection has not yet been created, press Create New Connection.
Read more about the Connections types and settings here.
3.A – Based on a Folder Connection
| Target (required) | Target either a single file by typing in Filename or target many files by typing in a Filename pattern (using Windows Wildcard symbols – more information here. |
| Source Character Set | Set the character set that the source file is encoded in. |
| Sheet number (required) | Enter the Excel sheet number. It is not possible to read from more than one sheet per Data Source. |
| Header Row | Enter the number of the row where the Header are placed in the files. The first row in the file is written as zero in the input field. If no headers are available in the file/files headers will be automatically be named as: #1, #2, #3, #4 |
| First Data Row (required) | Enter the row number for the first data row to be included in the Data Source, so that inorigo® will know on what row it should start reading the data. |
| Last Data Row | Set a last row to include in the Data Source – rows below will not be read and will not be available in the data source. |
3.B – Based on a URL Connection
| Method (required) | Choose HTTP Request method. Chosen method works as a request-response protocol between the URL and inorigo®. You can read more about HTTP Request methods here | |
| SOAP Action | Specifies the SOAP (Simple Object Access Protocol) action to use in the HTTP header when invoking this method as a web method via HTTP | |
| Accept (required) | The Accept request-header field is used to specify file types that are acceptable for the response. | |
| Content-Type (required) | Default: text/xml; charset=utf-8 | |
| Body | Request body if Method is set to POST | |
| Query String Key | Query String Value | Enter additional parameters to the URL address to assign specific values. |
| Target (required) | Enter the path to the target file. Target is added to the path defined by the connection. The full given path is displayed underneath the Target field. | |
| Source Character Set | Set the character set that the source file is encoded in. | |
| Sheet Number (required) | Enter the Excel sheet number. It is not possible to read from more than one sheet in per Data Source. | |
| Header Row | Enter the number of the row where the Header are placed in the files. The first row in the file is written as zero in the input field. If no headers are available in the file/files headers will be automatically be named as: #1, #2, #3, #4 | |
| First Data Row (required) | Enter the row number for the first data row to be included in the Data Source, so that inorigo® will know on what row it should start reading the data. | |
| Last Data Row | Set a last row to include in the Data Source – rows below will not be read and will not be available in the data source. |
HTML Table
Format
HTML needs to be Well Formed, meaning that it must adhere to the syntax rules specified by the XML 1.0 specification in that it must satisfy both physical and logical structures. Read more about Well Formed documents here
1. Name & Type
| Data Source Name (required) | Name the Data Source to find and use it in Data Source Editor and throughout inorigo®. |
| Data Source Type (required) | Choose the type of Data Source to create. Once a type is chosen, type-specific settings are in the next step of the wizard. |
2. Connection
Choose an available connection for the selected Data Source Type. If the desired connection has not yet been created, press Create New Connection.
Read more about the Connections types and settings here.
3.A – Based on a Folder Connection
| Target (required) | Target either a single file by typing in Filename or target many files by typing in a Filename pattern (using Windows Wildcard symbols – more information here. |
| Source Character Set | Set the character set that the source file is encoded in. |
| Header Row | Enter the number of the row where the Header are placed in the files. The first row in the file is written as zero in the input field. If no headers are available in the file/files headers will be automatically be named as: #1, #2, #3, #4 |
| First Data Row (required) | Enter the row number for the first data row to be included in the Data Source, so that inorigo® will know on what row it should start reading the data. |
| Last Data Row | Set a last row to include in the Data Source – rows below will not be read and will not be available in the data source. |
3.B – Based on a URL Connection
| Method (required) | Choose HTTP Request method. Chosen method works as a request-response protocol between the URL and inorigo®. You can read more about HTTP Request methods here | |
| SOAP Action | Specifies the SOAP (Simple Object Access Protocol) action to use in the HTTP header when invoking this method as a web method via HTTP | |
| Accept (required) | The Accept request-header field is used to specify file types that are acceptable for the response. | |
| Content-Type (required) | ?? | |
| Body | Request body if Method is set to POST | |
| Query String Key | Query String Value | Enter additional parameters to the URL address to assign specific values. ?? |
| Target (required) | Enter the path to the target file. Target is added to the path defined by the connection. The full given path is displayed underneath the Target field. | |
| Source Character Set | Set the character set that the source file is encoded in. | |
| Sheet Number (required) | Enter the Excel sheet number. It is not possible to read from more than one sheet in per Data Source. | |
| Header Row | Enter the number of the row where the Header are placed in the files. The first row in the file is written as zero in the input field. If no headers are available in the file/files headers will be automatically be named as: #1, #2, #3, #4 | |
| First Data Row (required) | Enter the row number for the first data row to be included in the Data Source, so that inorigo® will know on what row it should start reading the data. | |
| Last Data Row | Set a last row to include in the Data Source – rows below will not be read and will not be available in the data source. |
SQL
1. Name & Type
| Data Source Name (required) | Name the Data Source to find and use it in Data Source Editor and throughout inorigo®. |
| Data Source Type (required) | Choose the type of Data Source to create. Once a type is chosen, type-specific settings are in the next step of the wizard. |
2. Connection
Choose an available connection for the selected Data Source Type. If the desired connection has not yet been created, press Create New Connection.
Read more about the Connections types and settings here.
3. Data Source
| Mode (required) | Table: |
XML
Format
XML needs to be Well Formed, meaning that it must adhere to the syntax rules specified by the XML 1.0 specification in that it must satisfy both physical and logical structures. Read more about Well Formed documents here
1. Name & Type
| Data Source Name (required) | Name the Data Source to find and use it in Data Source Editor and throughout inorigo®. |
| Data Source Type (required) | Choose the type of Data Source to create. Once a type is chosen, type-specific settings are in the next step of the wizard. |
2. Connection
Choose an available connection for the selected Data Source Type. If the desired connection has not yet been created, press Create New Connection.
Read more about the Connections types and settings here.
3.A Based on a Folder Connection
| Target (required) | Target either a single file by typing in Filename or target many files by typing in a Filename pattern (using Windows Wildcard symbols – more information here. |
| Source Character Set | Set the character set that the source file is encoded in. |
| Parse Mode | XPath uses path expressions to select nodes or node-sets in an XML document. Choose a Parse Mode to reveal additional entry fields. |
| Row Path | Enter a path in the following structure “/data/people/person”. |
| Row Tag | Enter a tag that identifies a row in the XML sheet. |
| Column Tag (required) | Enter a tag that identifies a column in the XML sheet. |
| Table Path | Use to set what table to include if the XML contains more than one table. All tables are included if the entry field is left blank. |
| Header Row | Enter the number of the row where the Header are placed in the files. The first row in the file is written as zero in the input field. If no headers are available in the file/files headers will be automatically be named as: #1, #2, #3, #4 |
| First Data Row (required) | Enter the row number for the first data row to be included in the Data Source, so that inorigo® will know on what row it should start reading the data. |
| Last Data Row | Set a last row to include in the Data Source – rows below will not be read and will not be available in the data source. |
Advanced
| XSLT | Enter XSLT to transform the structure of the XML document before its read by inorigo®. |
3.B – Based on a URL Connection
| Method (required) | Choose http Request method. Chosen method works as a request-response protocol between the URL and inorigo®. | |
| SOAP Action | Specifies the SOAP (Simple Object Access Protocol) action to use in the HTTP header when invoking this method as a web method via HTTP | |
| Accept (required) | The Accept request-header field is used to specify file types that are acceptable for the response. | |
| Content-Type (required) | Charset for the content | |
| Body | Request body if Method is set to POST | |
| Query String Key | Query String Value | Enter additional parameters to the URL address to assign specific values. ?? |
| Target (required) | Enter the path to the target file. Target is added to the path defined by the connection. The full given path is displayed underneath the Target field. | |
| Source Character Set | Set the character set that the source file is encoded in. | |
| Parse Mode | XPath uses path expressions to select nodes or node-sets in an XML document. Choose a Parse Mode to reveal additional entry fields. | |
| Row Path | Enter a path in the following structure “/data/people/person”. | |
| Row Tag | Enter a tag that identifies a row in the XML sheet. | |
| Column Tag (required) | Enter a tag that identifies a column in the XML sheet. | |
| Table Path | Use to set what table to include if the XML contains more than one table. All tables are included if the entry field is left blank. | |
| Header Row | Enter the number of the row where the Header are placed in the files. The first row in the file is written as zero in the input field. If no headers are available in the file/files headers will be automatically be named as: #1, #2, #3, #4 | |
| First Data Row (required) | Enter the row number for the first data row to be included in the Data Source, so that inorigo® will know on what row it should start reading the data. | |
| Last Data Row | Set a last row to include in the Data Source – rows below will not be read and will not be available in the data source. |
Advanced
| XSLT | Enter XSLT to transform the structure of the XML document before its read by inorigo®. |
Data Source Columns
Columns
Columns allows you to
- Choose which columns to include
- Format Names
Press Select Columns to reveal all columns.
If the columns do not load as intended at this stage, make sure that the connection and the Data Source is properly configured.
The Add Columns Pop-up displays all columns with the Name, Data Type and order given in the source.
You can make changes to how inorigo® interpret and display these columns in the Data Source – but can always come back to the Add Columns Pop-up to view the columns as they are defined in the source.
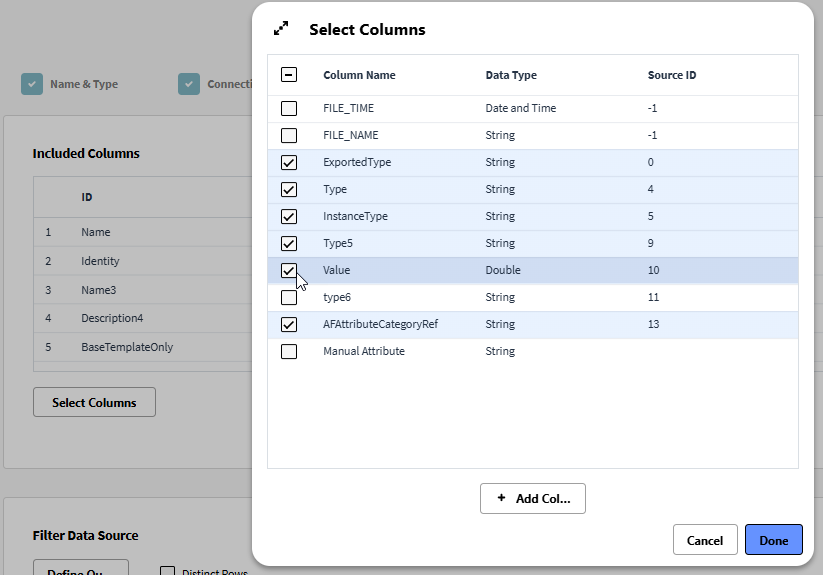
Columns as they are defined by the source
Tick the checkboxes of all columns that are to be included in the Data Source.
Add columns to create duplicates or to define different Data Types for one column. Calculated columns are not available in the Data Source Editor, import a data source to a knowledge set to use this functionality.
The columns FILE_TIME and FILE_NAME are included for CSV, Excel, XML type Data Sources
| FILE_TIME | Includes date and time of when the file was created or last modified |
| FILE_NAME | Includes the full path to the files location on the server |
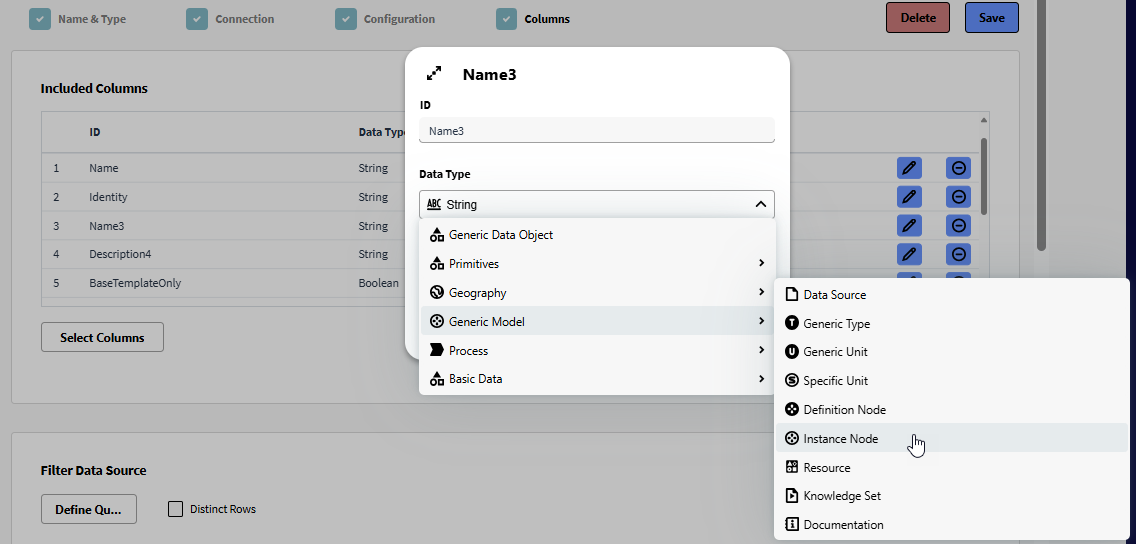
Changes in data type will cause inorigo® to interpret the columns as the given Data Type.
For inorigo® to identify content as inorigo® units (such as associations or association definitions), the column needs to hold the inorigo® units unique IDs. looking like this: 6bf-12af6-dd2b-55ae-ad43-b280007fe4d4
Click Add Columns to include the ticked columns in the Data Source.
The included columns appear in the Columns field as the image displayed below.
Names and Data Type can be modified.
Notice that these changes are saved in inorigo® and will not be applied to the source. To view the columns as they are defined by the source, press Add Columns.
It’s possible to add manual columns below the list of available columns. Use the Source ID given in the right column to refer to an available column.
Filter Data Source
The query tool can be used to apply custom filters to the Data Source.
Press Define query to bring up the query tool – you can learn more about how to write queries here
Tick distinct rows to remove all duplicate rows.
Preview Data Source
Preview displays a preview of the first rows in the data source.
Use preview to verify that applied filters and changes to the columns works as intended.
Once finish is pressed, the Data Source is saved and will be available to use throughout the inorigo® suite.
© 2025 Inorigo AB. All rights reserved.